Ian's 3D modelling experience notes
Editors Note: (MikeTheBee) This is a copy of a post Ian made over on the GoogleGroup. (https://groups.google.com/forum/?hl=en&fromgroups#!topic/tvreprapug/EOPBcjttilI%5B1-25%5D)
I don't usually post about prints, but this one is a bit different, so thought it might interest the community to show what you can do with 3D printers.
A friend of mine's father is a sculptor, who has a commision to produce a bronze scuplture of a sea otter (think Tarka) that will sit on a rock by the sea somewhere in Scotland. He and my friend went to the site recently and took a plaster cast of an area of the rock where the sculpture will sit, as well as many pictures of the rock, to help the sculptor visualise how the sculpture will fit together. The commisioning body is a wildlife park, and they are interested in selling small size reproductions of the sculture in their shop as well.
Using the pictures, my friend used Autodesk's 123D Catch http://www.123dapp.com/catch to create a 3D model of the rock, which he sent to me. Most meshing software produces a model that is a surface, and though it may describe a solid object, it is just describes the surface of the object with no volume. Imagine a sheet drapped over an object that stays in place once the object is removed; there is no way of telling what is the interior and exterior of the model (actually, most software produces surfaces where each vertices has a normal which defines the back and front, but this doesn't necessarily create an encolsed volume). The mesh also needs to be made manifold, or watertight, to be able to be printed.
In the case of the output of 123D Catch, the process is relatively simple, as the mesh doesn't have any holes, except for a big one underneath. For landscapes (this mesh and meshes created from, for example, satellite elevation data) I use a program called Accutrans 3D http://www.micromouse.ca/ (a 3D Object converter with some good features, 30-day trial but sort-of free as no limits on the software) to extrude the mesh with a flat bottom. I then use a combination of Meshlab http://meshlab.sourceforge.net/ (Open Source, a bit crash-prone) to clean up the mesh and Netfabb Studio Basic http://www.netfabb.com/basic.php (free) to cut the model into printable chunks, fix the mesh, and rotate them ready for printing.
For those that have missed out on my recent calibration antics, I suggest using Slic3r 0.8.2 and calibrating your extruder as per these instructions: https://github.com/alexrj/Slic3r/wiki/Calibration This gives me excellent print quality, and holes that are very nearly dimensionally accurate - usually 0.2mm undersize, but I can cope with that! Vertical walls are visibly less wobbly too, as the correct amount of filament is being extruded, so it's not squidging out the open side.
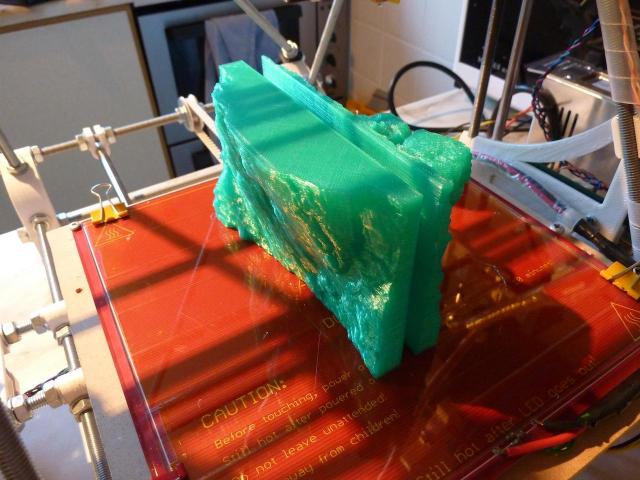
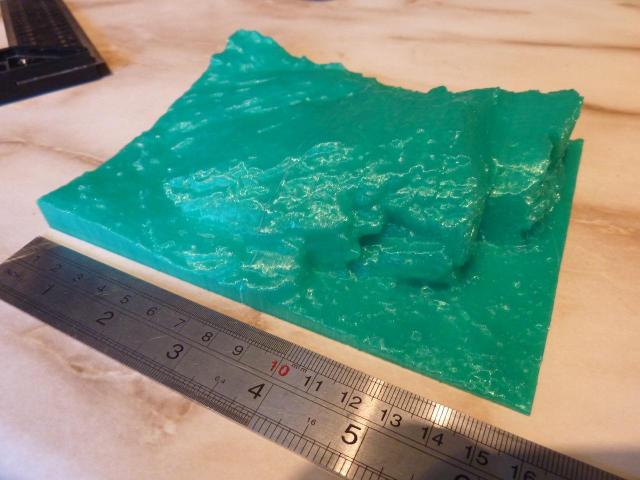
My printer has a limited amount of Z (just about 100mm). Past experience shows that printing large, flat objects leads to warping at the corners, and as this print was composed largely of only slightly inclined area, it would also mean that I would get a 'stepped' look, like a contour map, on the final print if printed flat. So I decided to print the rock in two parts, standing on end, so the top surface of the final model would have the smoother vertical wall part of the print. My friend wanted the finished print to be around 160mm on it's longest side, so I cut the model in half and orientated it to minimise overhangs.
Finally, 6 hours and 44 minutes later, the print is done! Pictures attached. The two parts should be able to be superglued together.


- mikethebee's blog
- Login to post comments
